Overview
This guide explains how to integrate Okta (IdP) with AWS IAM Identity Center (formerly AWS SSO) to centralize identity and enable SSO for console/CLI across multiple AWS accounts, using group‑based permission sets and least‑privilege access.
Prerequisites
Tools & Services
- AWS account with IAM Identity Center enabled
- Okta tenant with admin access
- AWS Organizations enabled for multi-account access (recommended)
Access & Permissions
- Okta Administrator role (to create app integration, enable SCIM, manage groups)
- AWS permissions in the management account to configure IAM Identity Center and assignments
Example AWS policy used during setup (scoped as needed):
{
  "Version": "2012-10-17",
  "Statement": [
    {
      "Sid": "IdentityCenterSetup",
      "Effect": "Allow",
      "Action": [
        "organizations:*",
        "sso-directory:*",
        "sso:*",
        "iam:GetRole",
        "iam:UpdateAssumeRolePolicy",
        "iam:CreateRole",
        "iam:DeleteRole",
        "iam:AttachRolePolicy",
        "iam:PutRolePolicy",
        "iam:DetachRolePolicy",
        "iam:CreateServiceLinkedRole",
        "iam:DeleteRolePolicy",
        "iam:ListAttachedRolePolicies",
        "iam:ListRolePolicies",
        "iam:GetSAMLProvider",
        "ds:UnauthorizeApplication",
        "ds:DescribeDirectories",
        "ds:AuthorizeApplication"
      ],
      "Resource": "*"
    }
  ]
}
Steps
Step 1: Enable IAM Identity Center and switch identity source
- In AWS console, open IAM Identity Center.
- If not enabled, select Enable.
- Go to Settings → Identity source → Actions → Change identity source → External identity provider → Next.
Step 2: Create Okta integration for AWS IAM Identity Center
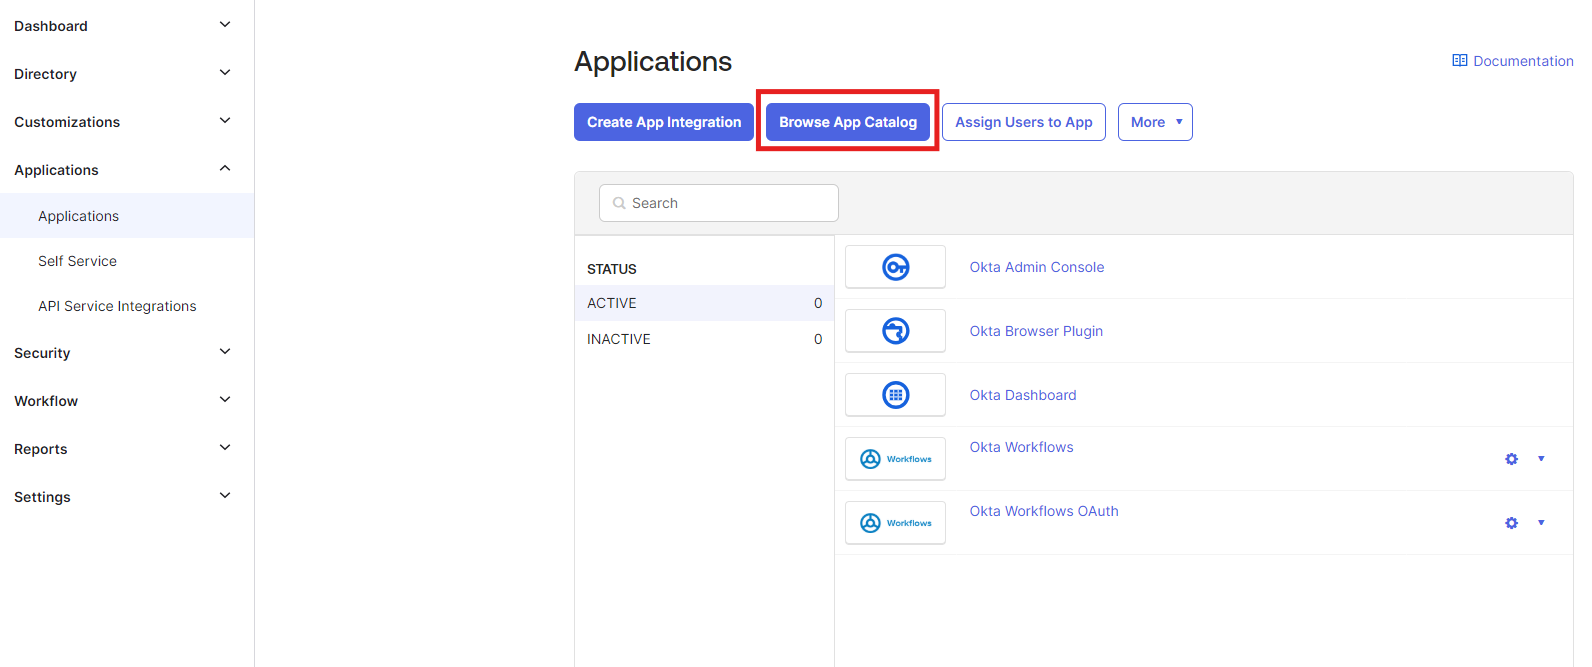
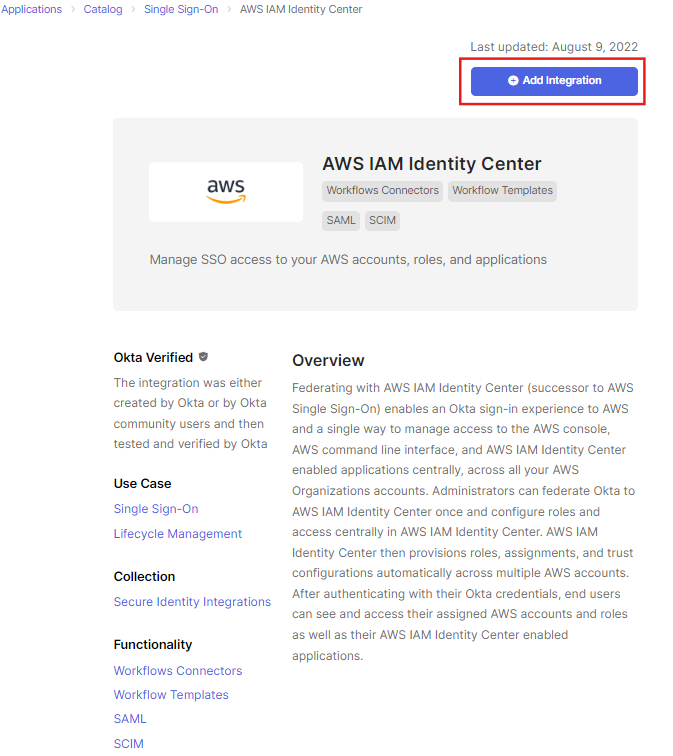
- In Okta Admin, Applications → Browse App Catalog → search “AWS IAM Identity Center”.
- ToaAdd the integration select the AWS IAM IDENTITY CENTER from the catalog, proceed to integrate it with OKTA.
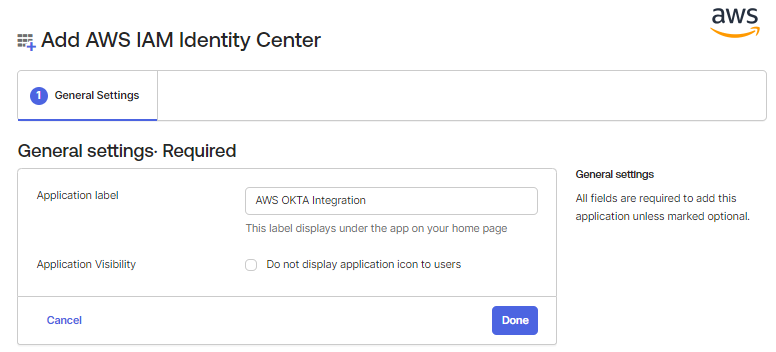
- Give the integration a recognizable label/name.
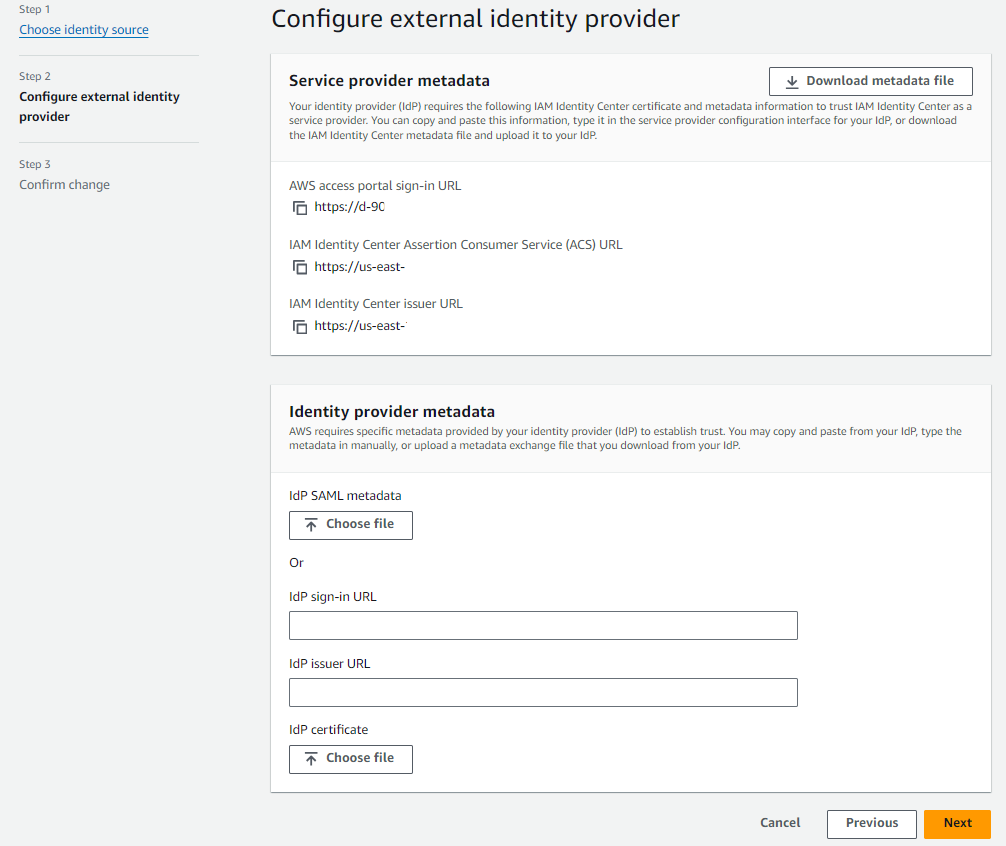
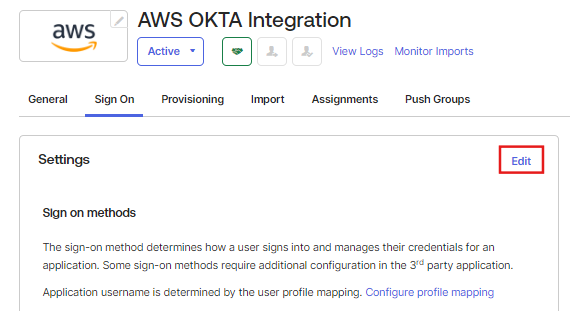
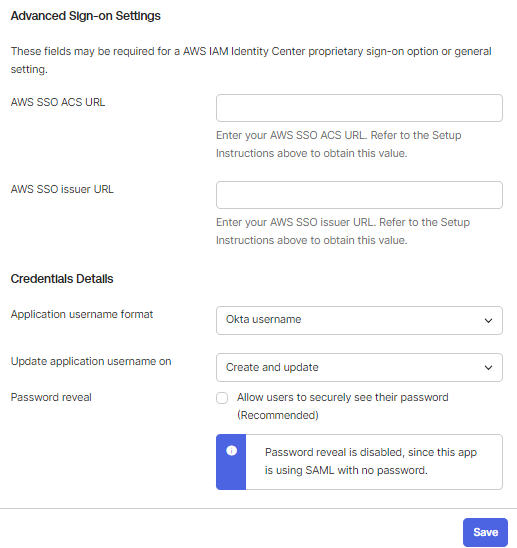
Step 3: Populate SAML endpoints in Okta
- In Okta app → Sign On → Edit settings.
- From AWS IAM Identity Center Settings, copy:
- Assertion Consumer Service (ACS) URL
- Identity Center Issuer URL
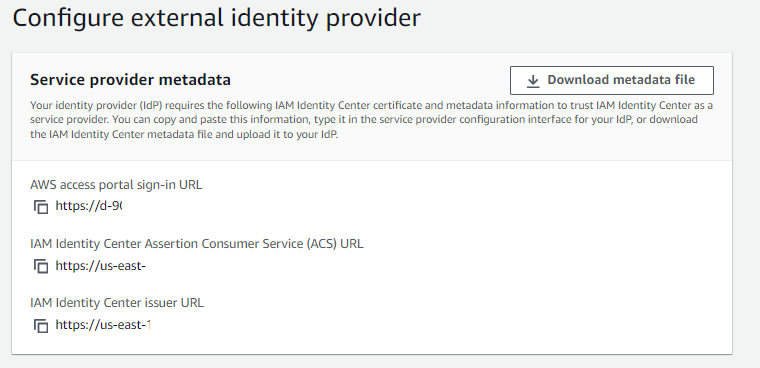
- Paste these into the Okta fields for AWS SSO ACS URL and AWS SSO Issuer URL.
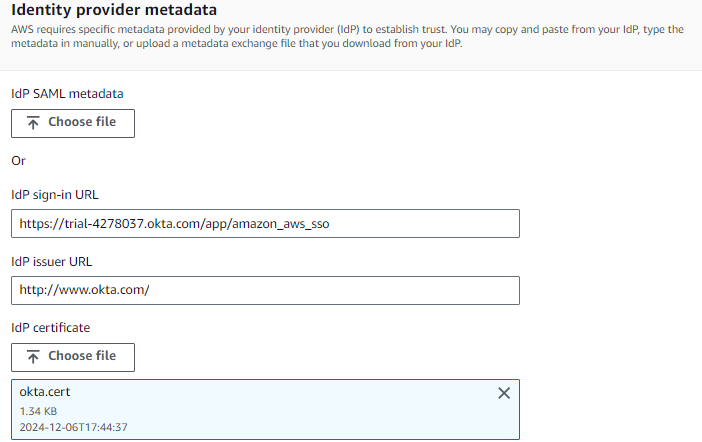
Step 4: Provide IdP metadata to AWS
- In Okta SAML Signing Certificates, download the certificate.
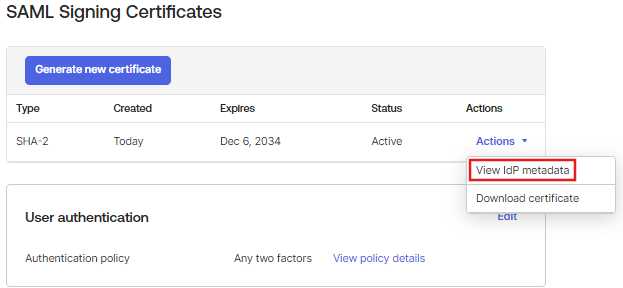
- View IdP metadata and copy:
EntityID → use as IdP Issuer URL
SingleSignOnService Location → use as IdP sign-in URL

- In AWS IAM Identity Center → Identity provider metadata, paste the two URLs and upload the Okta certificate. Save.
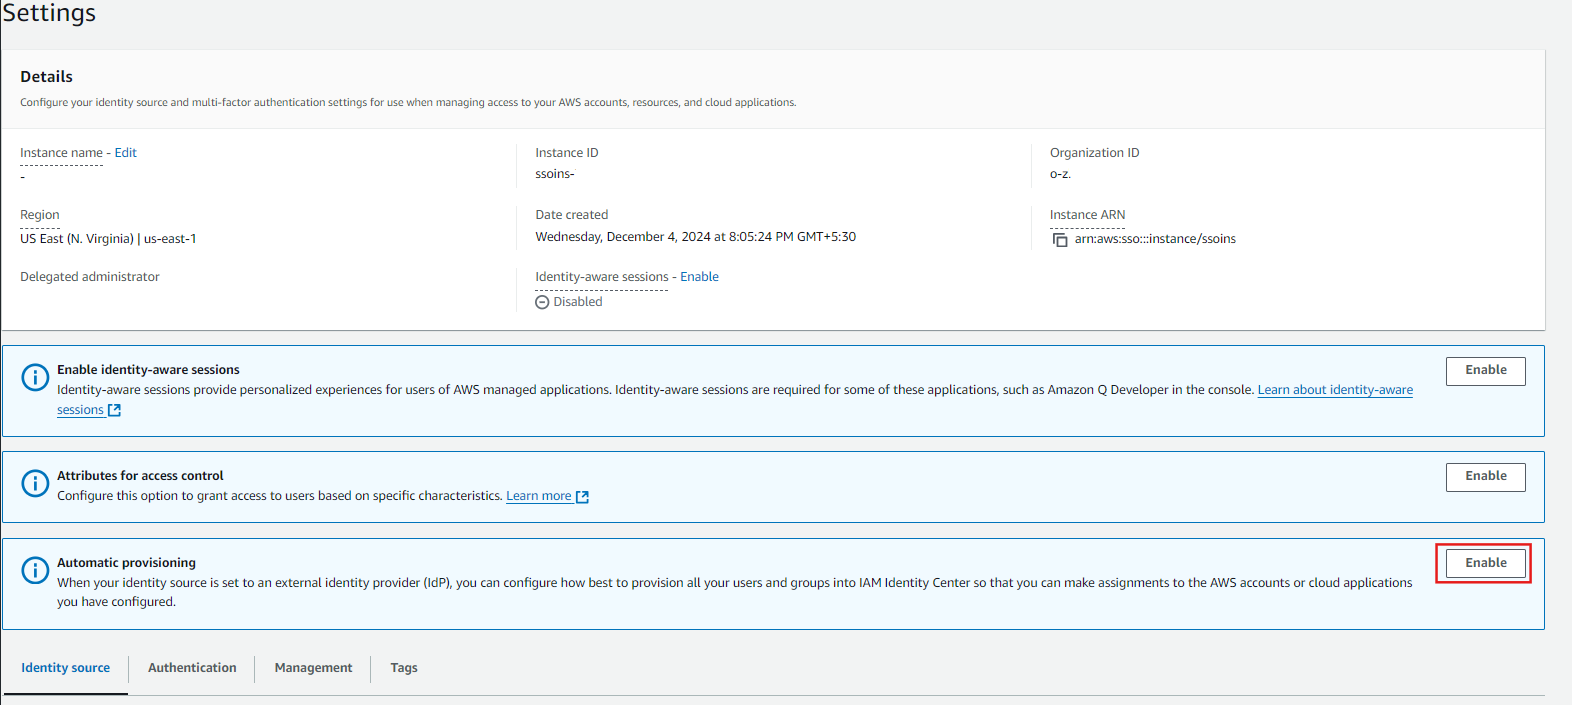
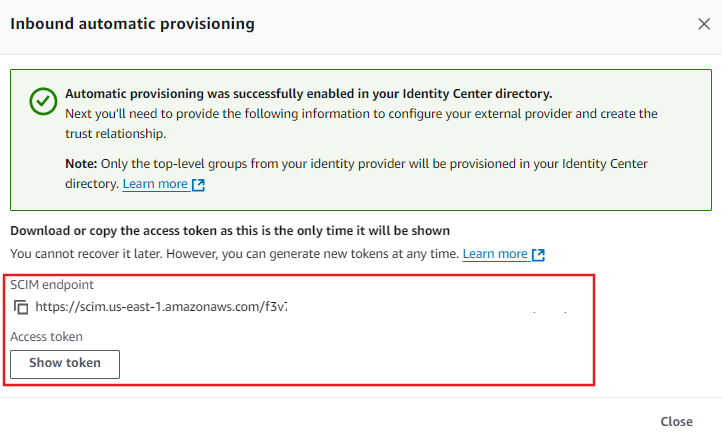
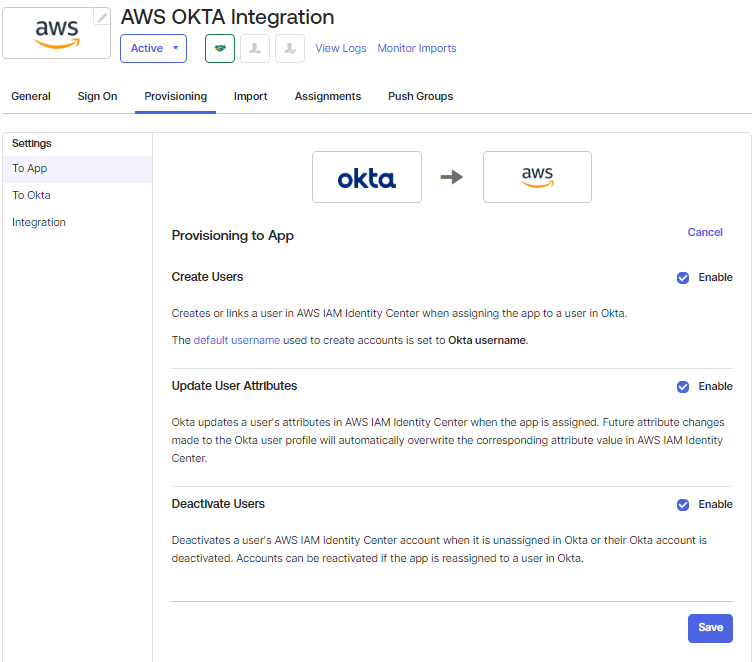
Step 5: Enable SCIM provisioning
- In AWS IAM Identity Center → Settings → Automatic provisioning → Enable. Copy the SCIM endpoint and access token.
- In Okta app → Provisioning:
- Base URL = SCIM endpoint
- API Token = access token
- Test the API credentials, then Save.
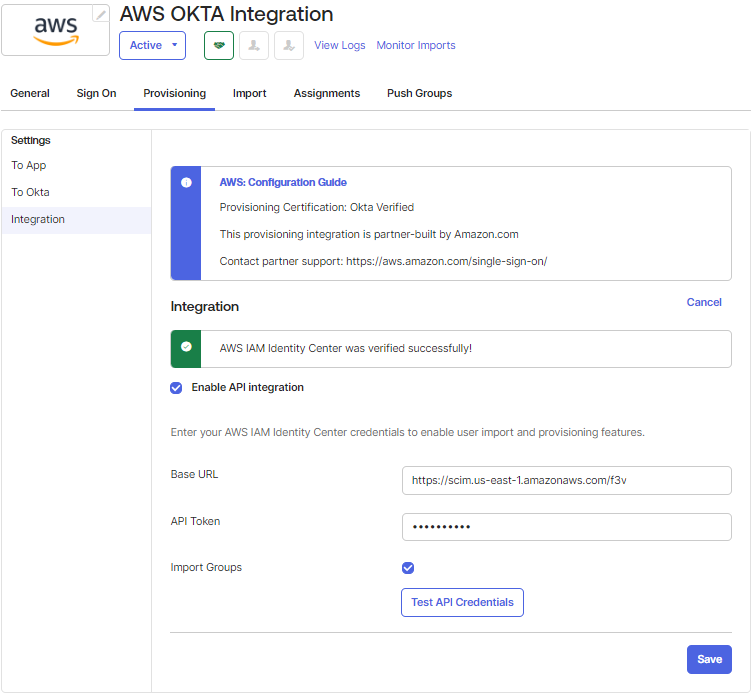
- Enable Create Users, Update User Attributes, and Deactivate Users.
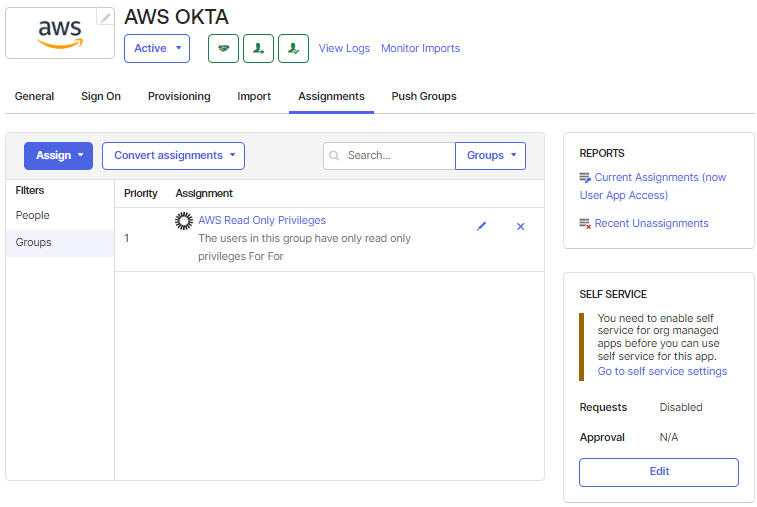
Step 6: Assign users and groups in Okta
- Okta → Assignments: add users and/or groups to the AWS app.
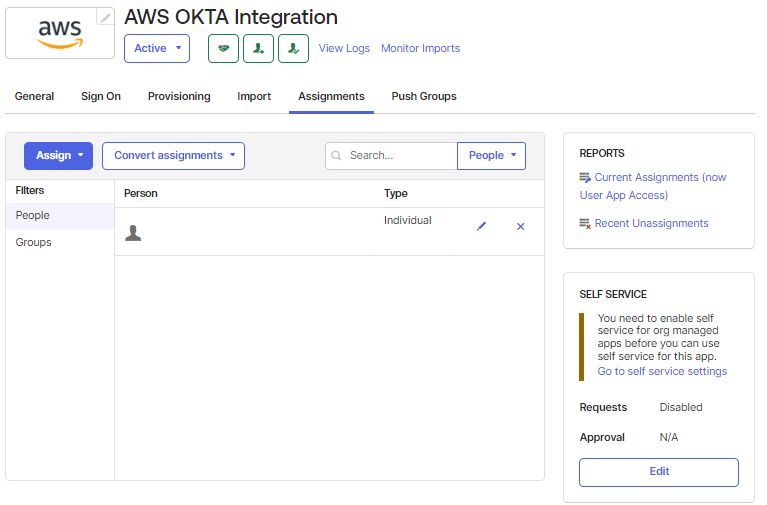
- Confirm users appear in AWS IAM Identity Center → Users.

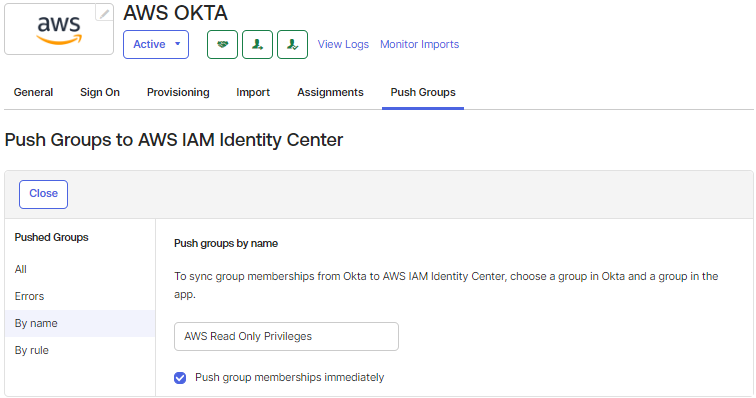
Step 7: Push groups from Okta to AWS
- Create the user group on Okta
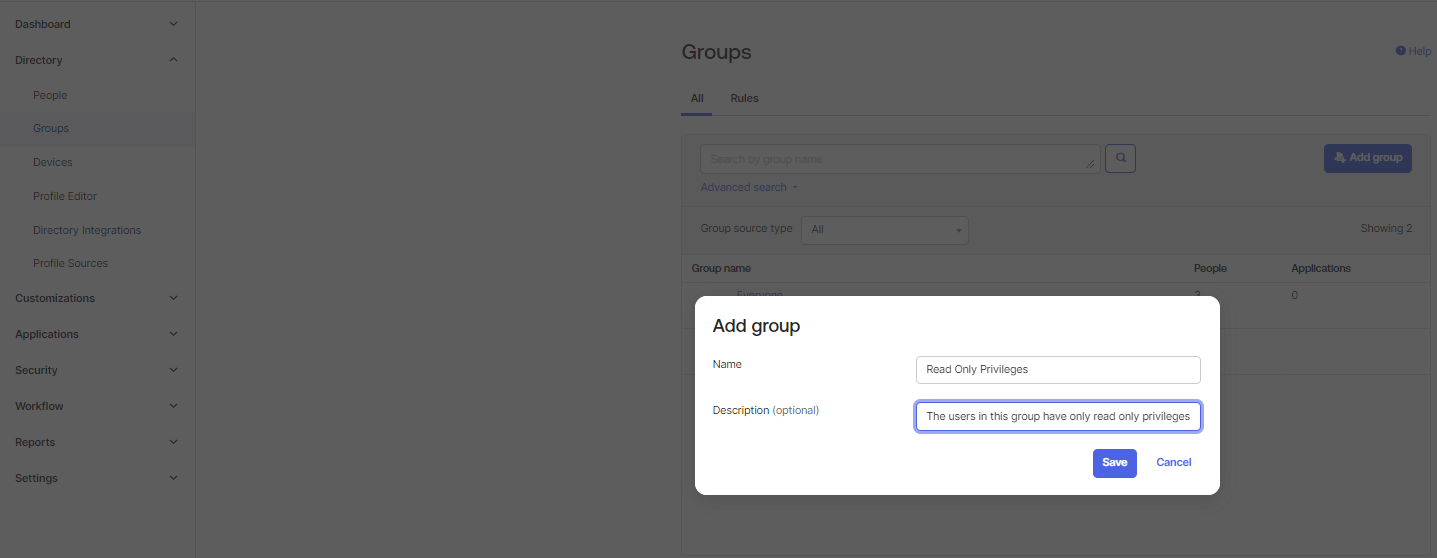
- After creating the group select that group and add/assign people in the particular group. (If Group(s) already exists then Skip this Step)
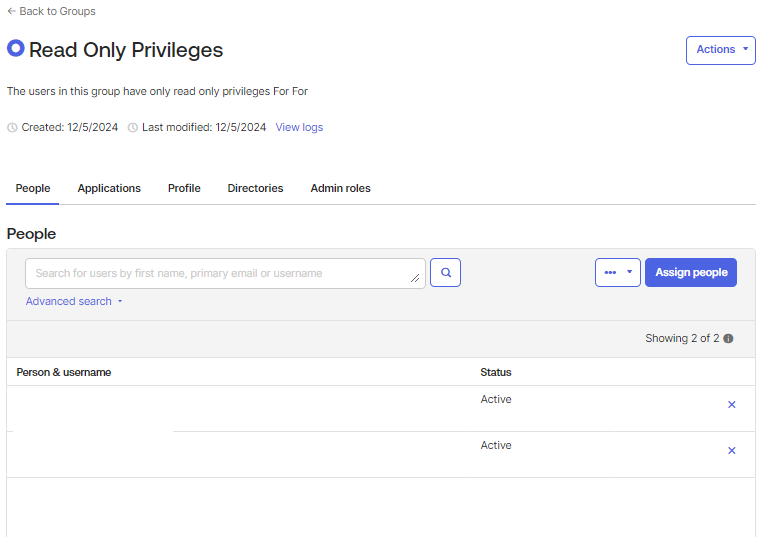
- Go to the Application that was created for the integration and navigate to the Assignments sections. Select the group from the filters and then assign the group whose users require access.
Use Group Push in Okta:
- Option A: Push specific groups by name
- Option B: Define rules (starts with / ends with / contains) to push matching groups automatically
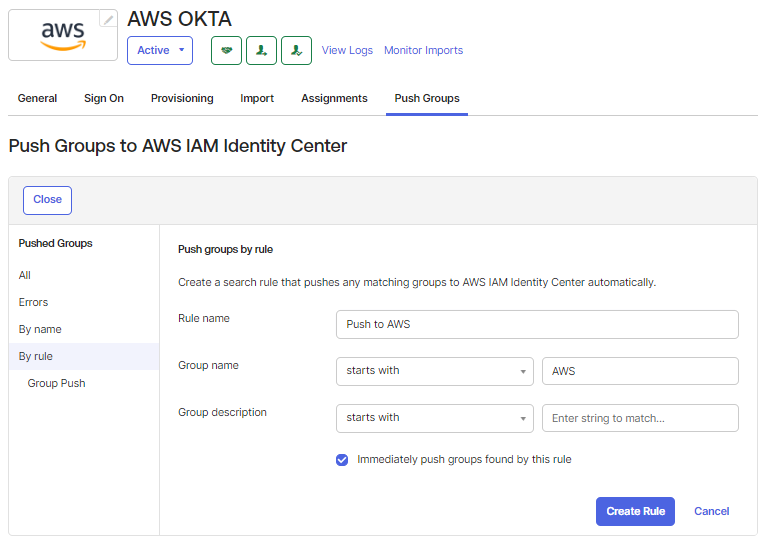
- After saving the configuration for pushing the Groups Based on Names or Using the Rule to identify the Groups to be pushed, the Groups will be pushed to AWS, if new users are added/removed then the changes will also be reflected in real-time on AWS.

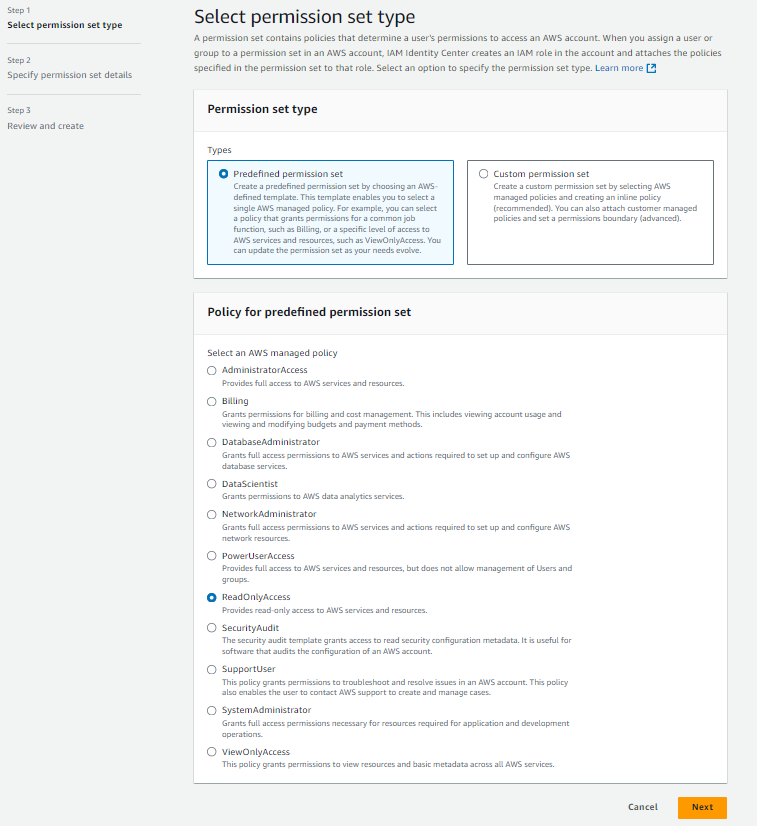
Step 8: Create permission sets in AWS
- IAM Identity Center → Multi-account permissions → Permission sets → Create.
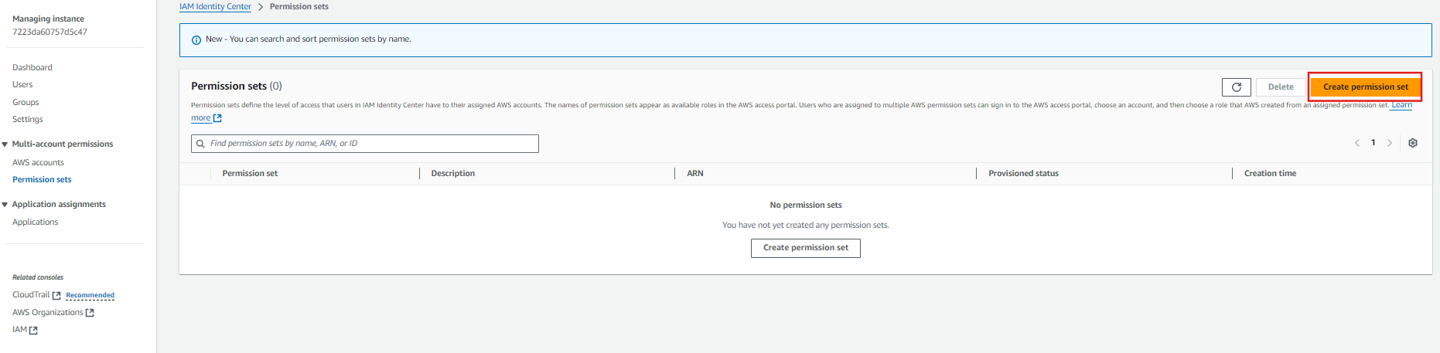
- Choose predefined (AdministratorAccess, ReadOnlyAccess, PowerUserAccess) or define custom least‑privilege sets.
Step 9: Assign groups to accounts and permission sets
- IAM Identity Center → AWS accounts → Assign users or groups.
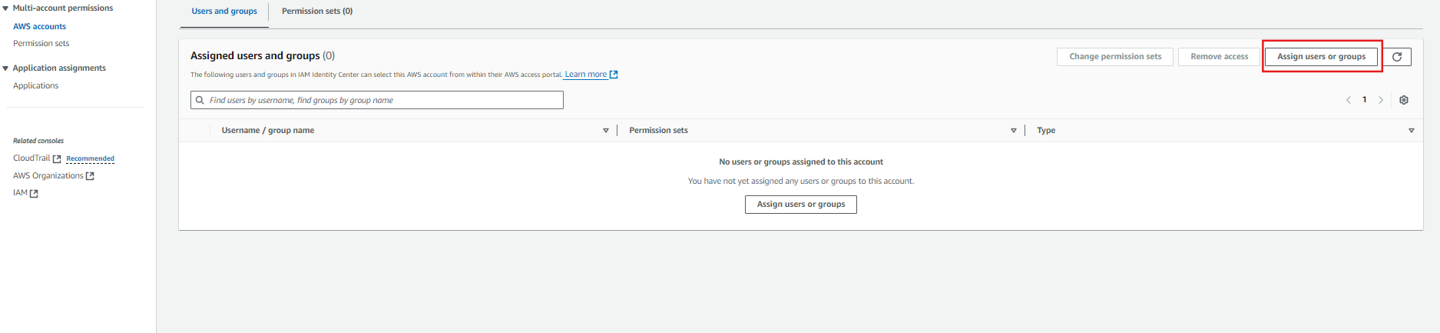
- Select group(s), choose target account(s), and attach appropriate permission set(s).
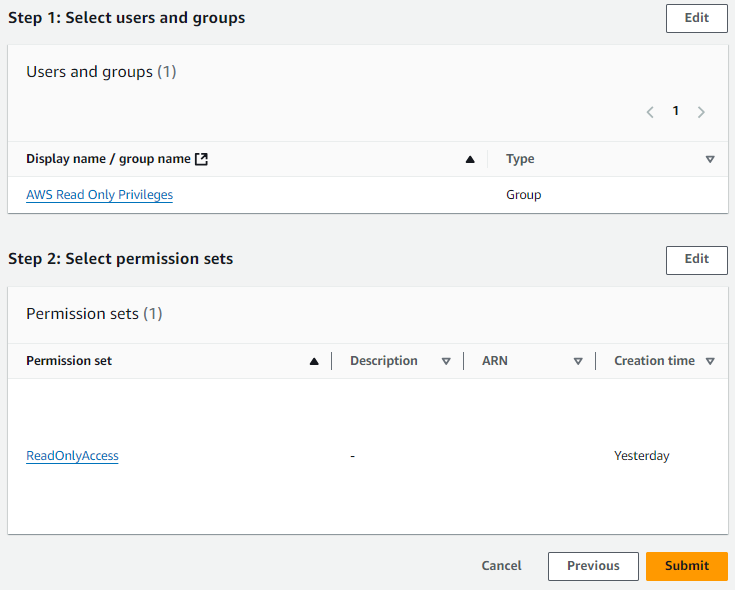
- Submit; reprovisioning applies assignments.
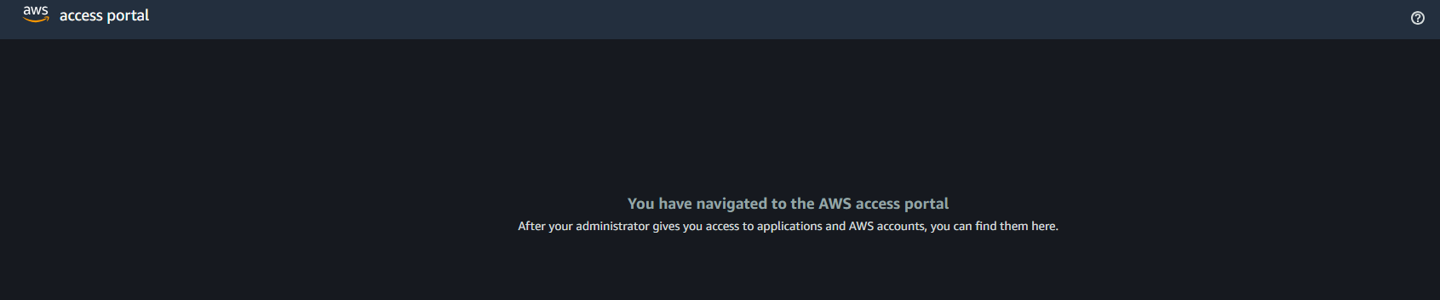
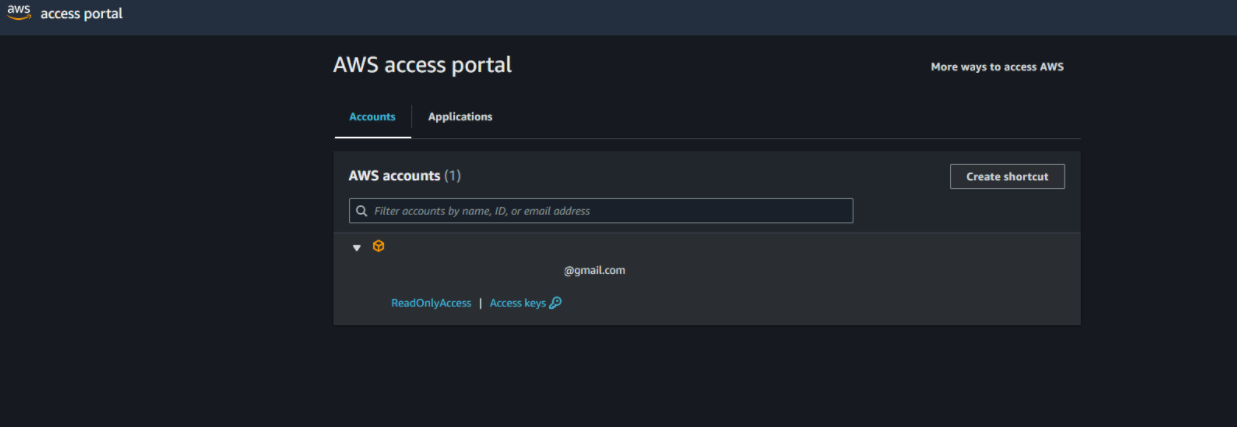
Step 10: Validate SSO (console and CLI)
- End user signs into Okta, clicks the AWS tile → redirected to AWS account/role chooser.
- For CLI, configure
aws sso loginprofiles against the same Identity Center instance and test role access.
Troubleshooting
- Access denied: Verify group assignment to the correct account and permission set; check propagation.
- Login loops or metadata errors: Re-check ACS/Issuer URL mapping and Okta certificate upload.
- SCIM sync not working: Re-test API credentials; rotate token if expired; verify Group Push configuration.
- Group present but no roles: Ensure the group is assigned to accounts with at least one permission set.